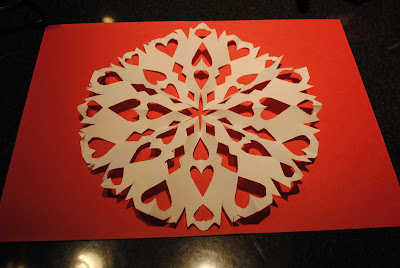
This art project is one of the things I miss most about teaching.

Fold bottom right corner up along the center fold, repeat with left Corner

Fold the excess paper down over center Flaps
Fold back tips of fold and glue to back with a TINY drop of Glue
Write name in pencil on flap and trace over with Black Felt Tip

Sample

Snowflakes to use if you have no paper Doilies
Fold in half to make a paper Airplane
Copy Paper not Construction


Cut off tip of Plane
Cut off back of plane to its lowest Level
Cut designs alone sides of plane....to make a heart, cut out 1/2 of a Heart
Cut design along top of Plane

Even after so many years, I get a little thrill when I open to see the full Effect

Use whole or cut into Pieces
Easy with the Glue


Bouncing Heart
Fold strips of copy paper (not construction) back and forth at right Angles
Glue to back of small heart and to the larger design....eyes, nose, another Heart

Notice the little spring on the Back
I don't know why I find this so Cute

Have Fun you TEXAS TEACHERS!!!
This was a two day project for my class. Paper airplanes one day and the heart the next. As each child completed the heart, I stapled them onto the bulletin board. The morning they brought their cards, in groups of five or six they were allowed to place their cards into the hearts. The hearts filled to overflowing were delivered to the students as they were eating their Valentine Party Goodies. I placed all of my students desks into a large circle in the classroom so that they could see each other as they ate and read their valentines. It was a lovely last hour of the Day.


I love a good blog tutorial! Parker and I are going to get busy. Nice pics!!!
ReplyDeleteI'm with Sarah and Parker. Grace and Hudson will love these. Great instructions and pictures. m
ReplyDelete